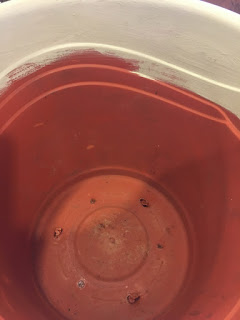
Here are instruction of how to go from:
THIS------------- TO --------------------THIS!
Like any paint project, you need to start with a clean surface. Spray clean with water your pot, then use a scratchy sponge to remove anything that sticks to the surface. Allow to dry, then get painting! Make sure your pot has small holes in the bottom for water run-off to help your plants during rainy weather. A drill works nicely for this. Or hammer some holes in with a thick nail.
Here are a list of items you will need. Choose colors of paint to meet your tastes and design!
Chalk Paint® decorative paint by Annie Sloan -- 2 - 3 color minimum and you only need the 4 oz size, We used Country Grey, Old White and Coco
Artisan Enhancements Fine Stone and Clear Topcoat Sealer -- 8 oz sizes
Paint brush -- one natural bristle, one synthetic
Artist brush
Sea sponge (optional)
Off-set Knife
Stencil
I chose Country Grey for my base color. Make sure to stir well for wonderful adherence. I painted inside the pot to below the soil line so it would match the rest. One complete coat, stippling on the paint to create texture.
When your paint dries, you will see the texture you created with the stippling of your brush to the paint! Ah, a "stony" texture.


Next, remove the stencil, scrape off excess Fine Stone and put back into your container and stir in -- no waste! Repeat the stenciling according to your own pot design. I like the rough look of the design after it dries. Or you may sand it gently to remove rough edges.
Be sure to clean off the excess Fine Stone, then simply wash off the stencil with warm water while the Fine Stone is still damp. The stencil is totally re-usable again!
Next you can blot and paint with a second paint color. I chose Old White. You might also apply it with a sponge, leaving the original Country Grey visible to varying degrees.
When the paint dried, I took Coco and added a bit of Old White, just to tone it down. I wanted a color to set it off the design a little from the background.
And finally, two thin coat of Artisan Enhancements Clear Topcoat Sealer applied with a fine synthetic brush gives additional protection and is water-proof when cured (approximately two days).
The entire process takes just a few hours and you can do numerous pots at once -- even better! I can't wait to do more!
 And the best part -- using your "new stone" pot on your deck or in the garden! My setting is a bit unique. I had a volunteer cedar that had to come out of the garden, but I had them leave the buttom three-and-a-half feet alone. I drilled a screw through the pot into the trunk for a stand for a pot of flowers.


I like that.
ReplyDeleteشغل جميل ومرتب يستحق المشاهدة
ReplyDelete